负载均衡介绍
负载均衡方案主要有2种模式:
1、服务端进行负载,如 Nginx,F5(硬件负载均衡器)
2、客户端自行负载均衡,如在服务上自行引入Ribbon实现负载均衡
1)服务端负载均衡
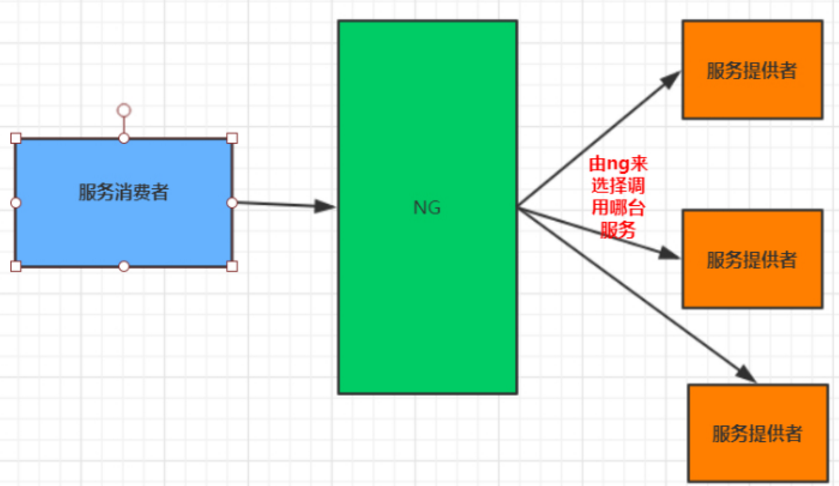
当请求进入Nginx后,由Nginx进行负载均衡算法,决定发送给哪个服务器。
2)客户端负载均衡
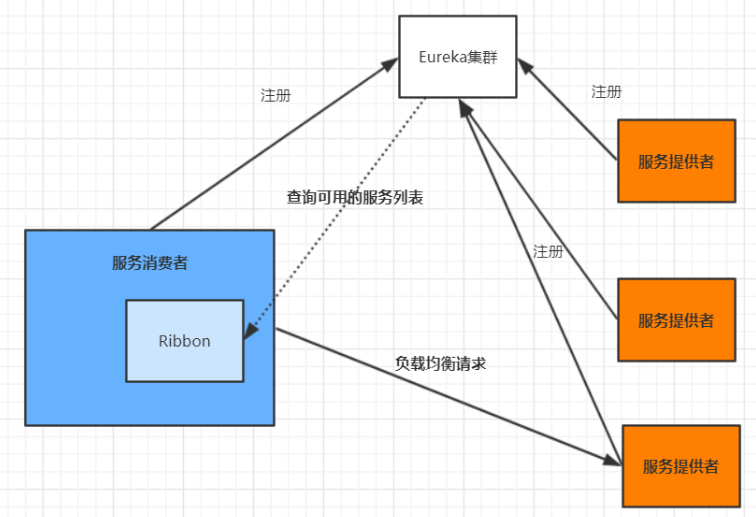
例如Spring Cloud的Ribbon负载均衡器,客户端本地会通过Eureka、Nacos获取可用的服务列表,然后通过Ribbon进行请求,Ribbon会根据负载均衡算法,选择出最优的节点进行访问。
3)常见的负载均衡算法
- 随机,通过随机算 选择服务进行访问
- 轮询,负载均衡的默认实现方式
- 权重轮询,我们可以根据给高配置的服务器加权重,那么轮询的时候会优先轮询权重高的服务器
- 地址hash,通过对服务器的地址进行hash 取模后找到对应的服务器,然后把请求转发过去
- 最小连接数,比较合理且用的多的方案,根据服务器的情况,如 连接数量,请求积压情况,把请求分配到压力最小的服务器上
Ribbon负载均衡器
1)Ribbon介绍
Spring Cloud Ribbon是基于Netflix Ribbon 实现的一套客户端的负载均衡工具,Ribbon客户端组件提供一系列的完善的配置,如超时,重试等。通过Load Balancer获取到服务提供的所有机器实例,Ribbon会自动基于某种规则(轮询,随机)去调用这些服务。Ribbon也可以实现我们自己的负载均衡算法。
2)Spring Cloud Alibaba整合Ribbon
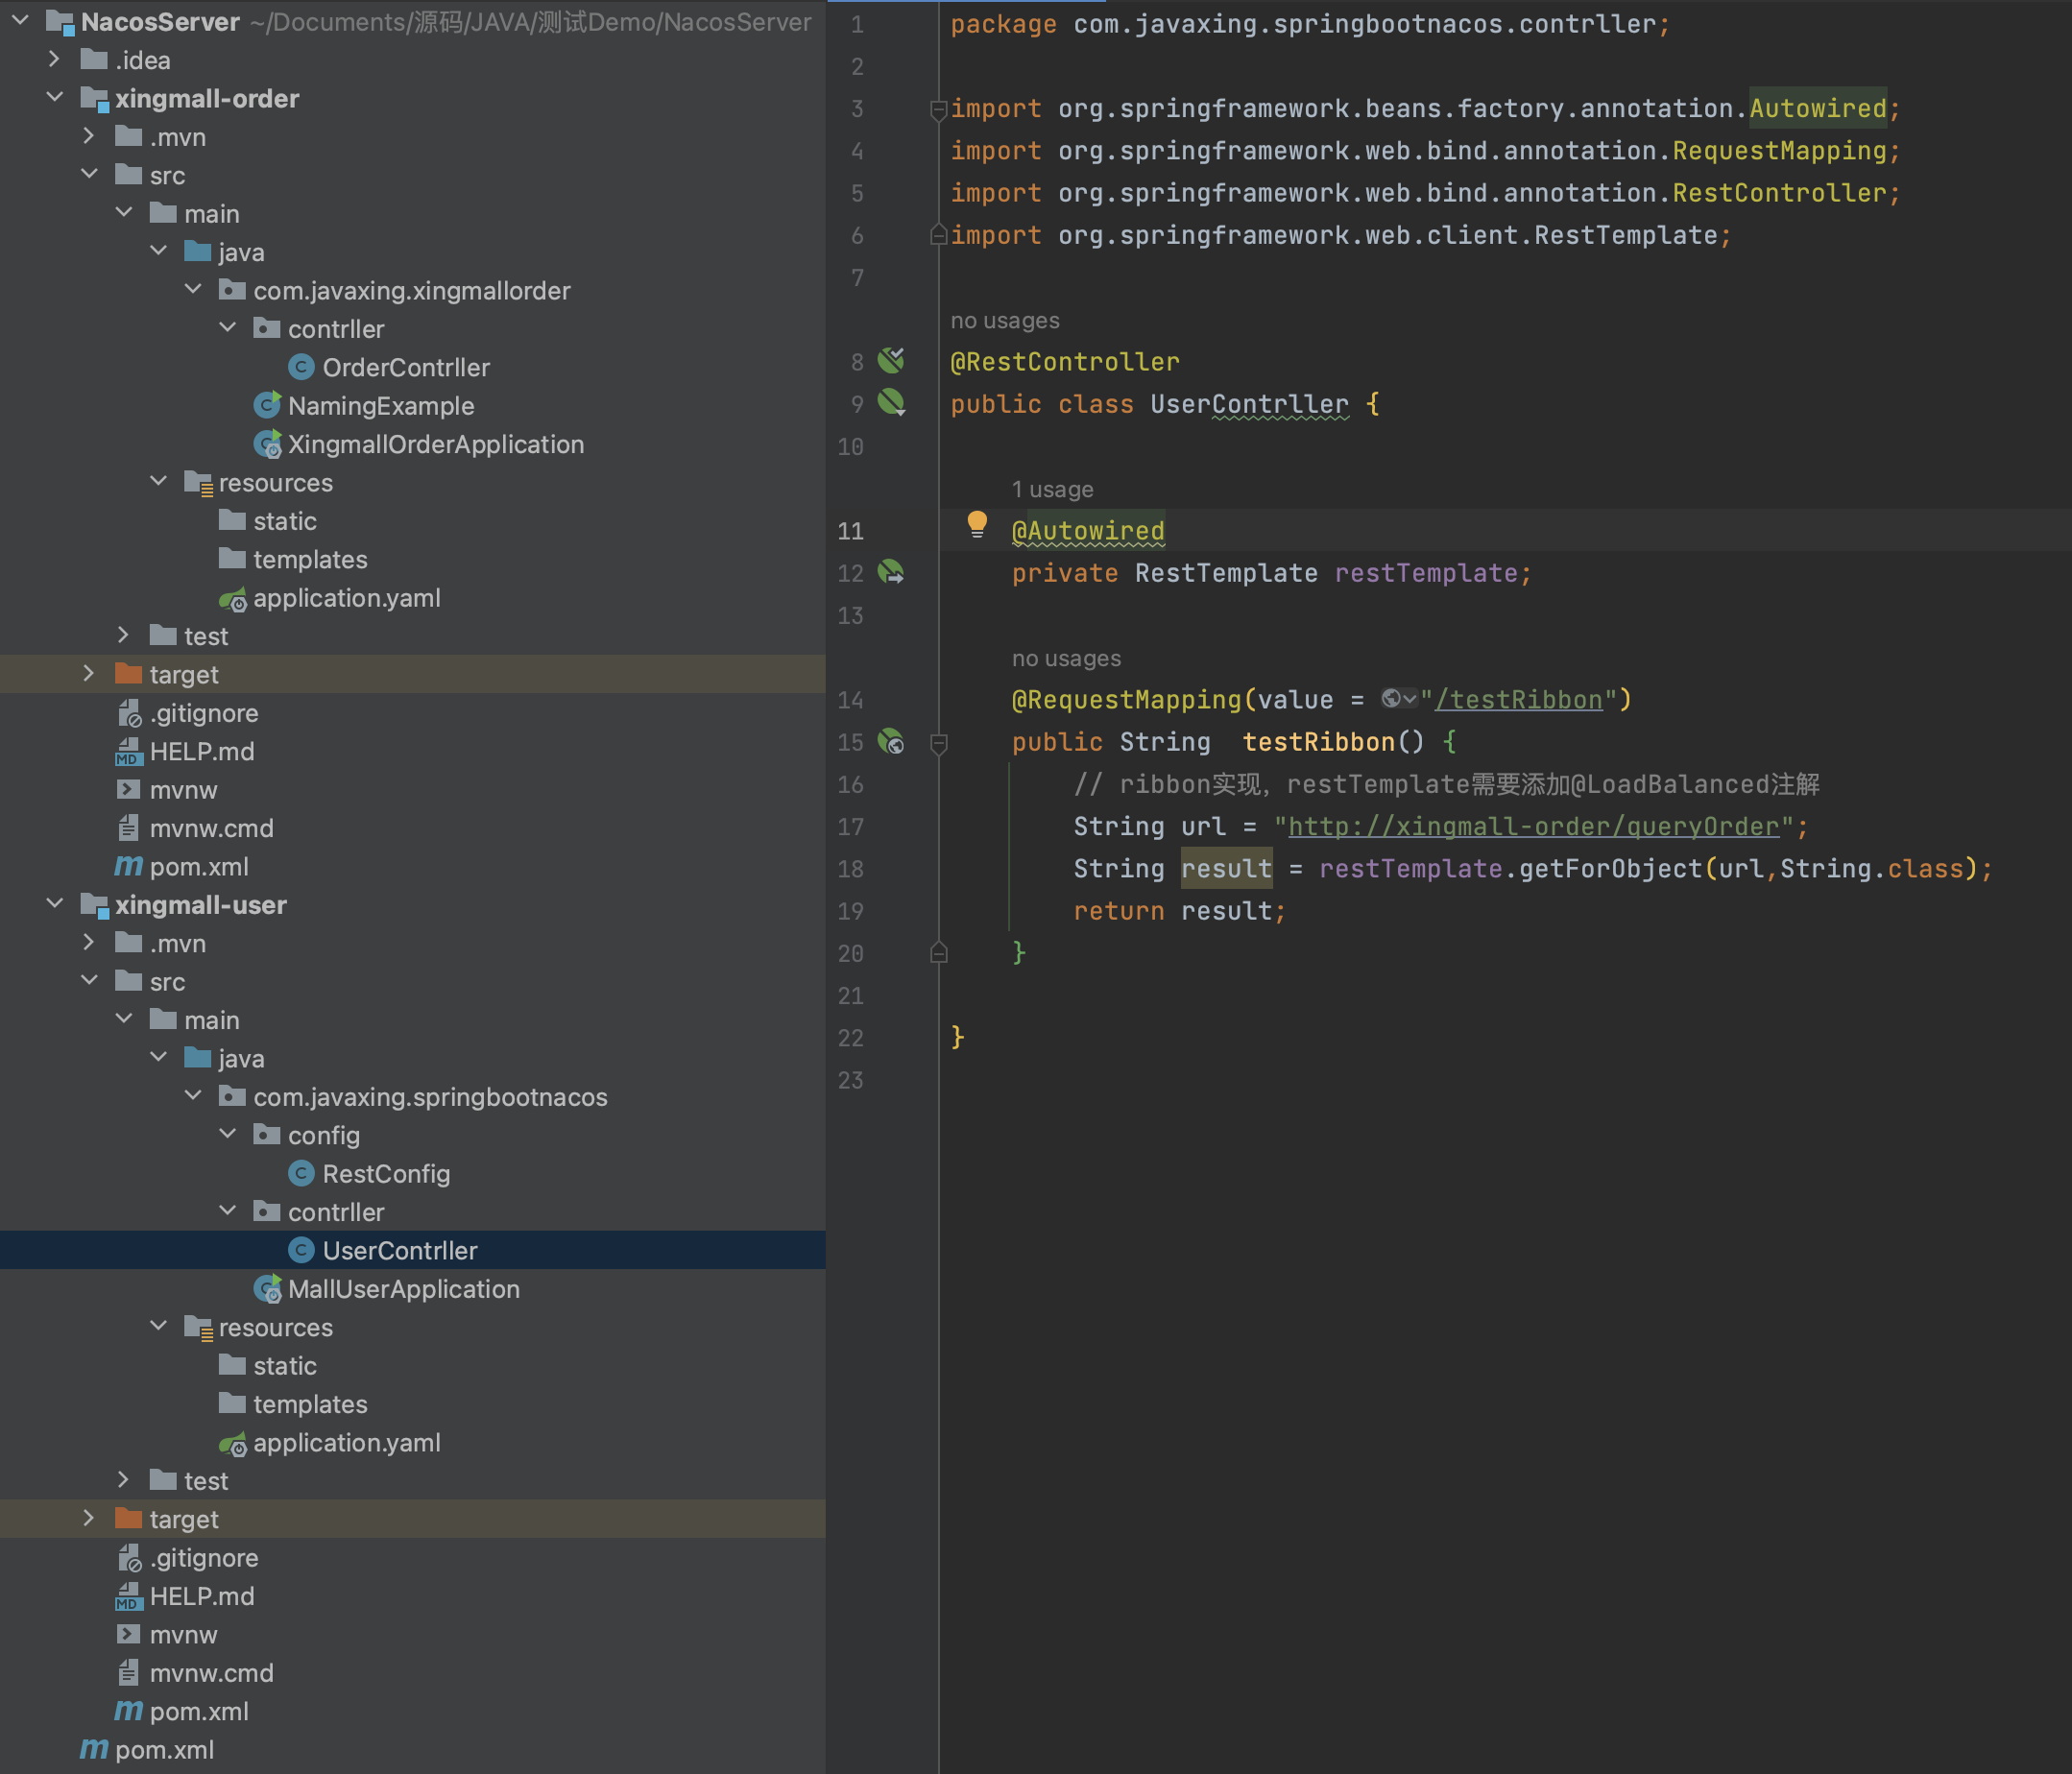
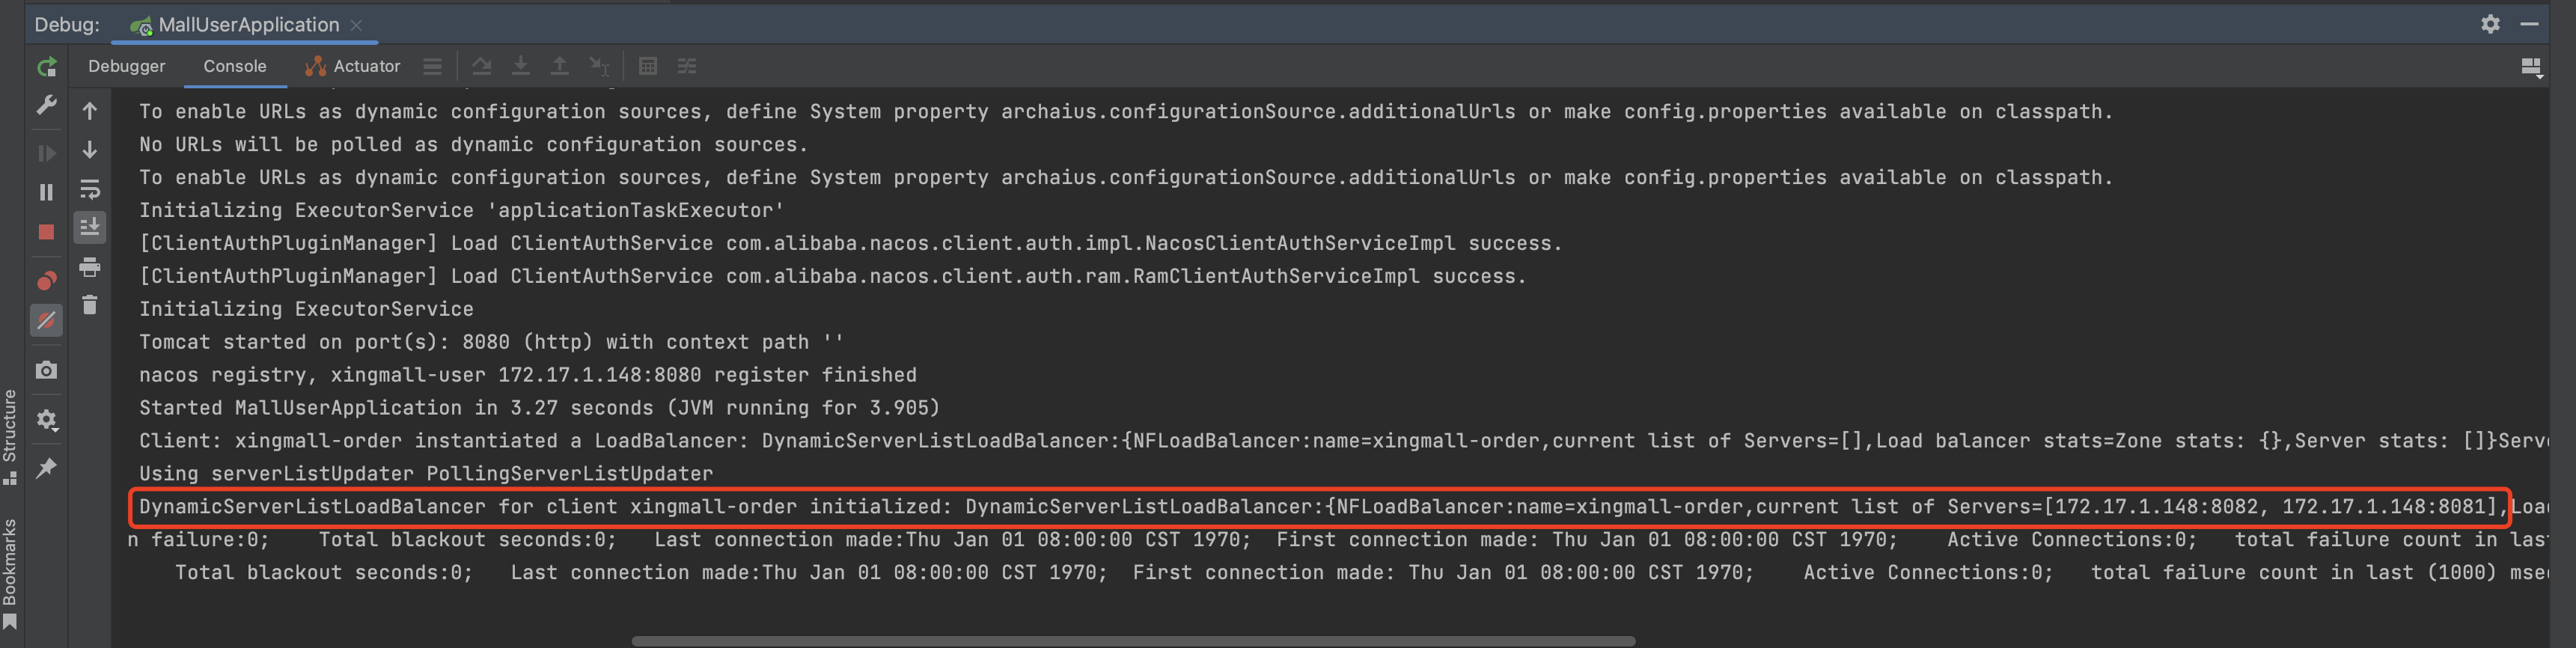
创建2个模块,xingmall-order 订单模块,xingmall-user 用户模块,我们在用户模块上通过ribbon负载均衡的使用RestTemplate请求xingmall-order的接口。
实验使用的源码:https://files.javaxing.com/Java%08Demo/NacosServer.zip
2.1 引入ribbon依赖
1
2
3
4
5
|
<dependency>
<groupId>org.springframework.cloud</groupId>
<artifactId>spring-cloud-starter-netflix-ribbon</artifactId>
</dependency>
|
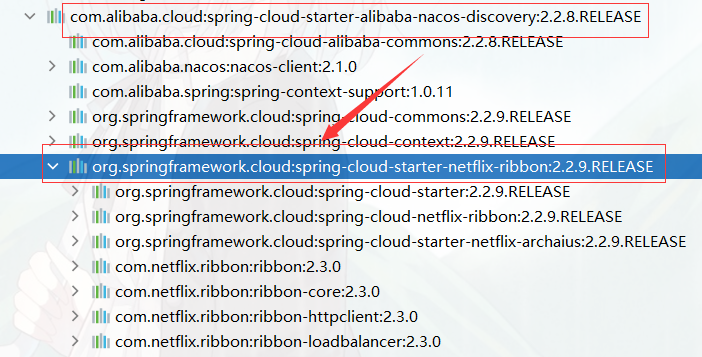
如果我们的微服务引入了nacos,就不需要再引入ribbon了,因为nacos-discovery依赖了ribbon。
2.2 创建微服务模块
2.3 编写controller代码
user
1
2
3
4
5
6
7
8
9
10
11
12
13
14
15
16
17
18
19
20
21
22
| package com.javaxing.springbootnacos.contrller;
import org.springframework.beans.factory.annotation.Autowired;
import org.springframework.web.bind.annotation.RequestMapping;
import org.springframework.web.bind.annotation.RestController;
import org.springframework.web.client.RestTemplate;
@RestController
public class UserContrller {
@Autowired
private RestTemplate restTemplate;
@RequestMapping(value = "/testRibbon")
public String testRibbon() {
String url = "http://xingmall-order/queryOrder";
String result = restTemplate.getForObject(url,String.class);
return result;
}
}
|
order
1
2
3
4
5
6
7
8
9
10
11
12
13
14
15
16
17
18
| package com.javaxing.xingmallorder.contrller;
import org.springframework.beans.factory.annotation.Autowired;
import org.springframework.web.bind.annotation.GetMapping;
import org.springframework.web.bind.annotation.RequestMapping;
import org.springframework.web.bind.annotation.RestController;
import org.springframework.web.client.RestTemplate;
@RestController
public class OrderContrller {
@GetMapping("/queryOrder")
public String queryOrder(){
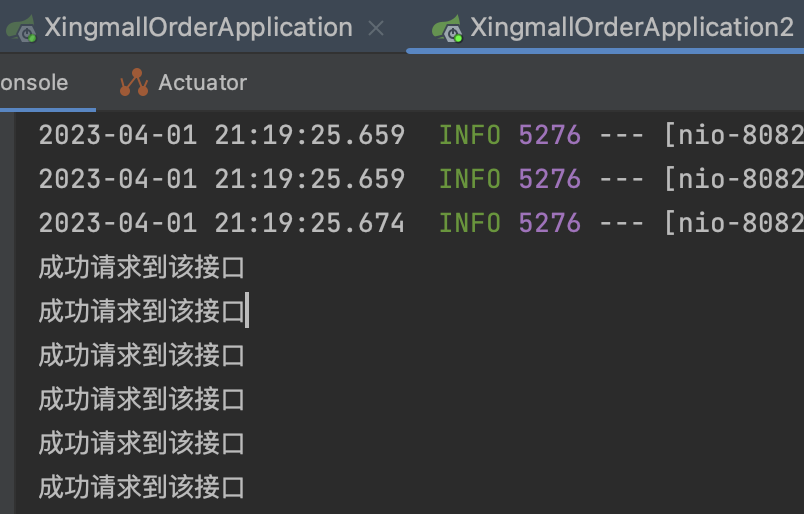
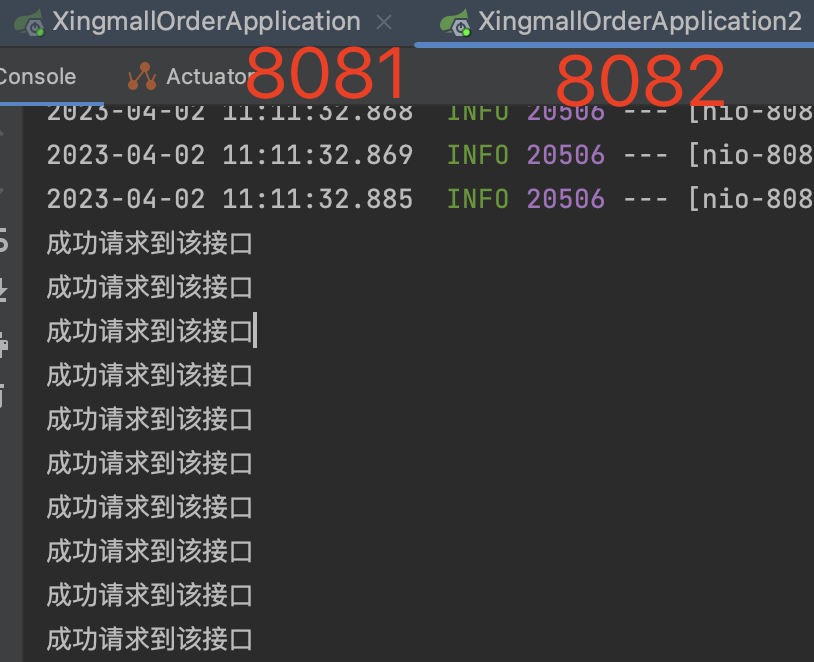
System.out.println("成功请求到该接口");
return "Query Success";
}
}
|
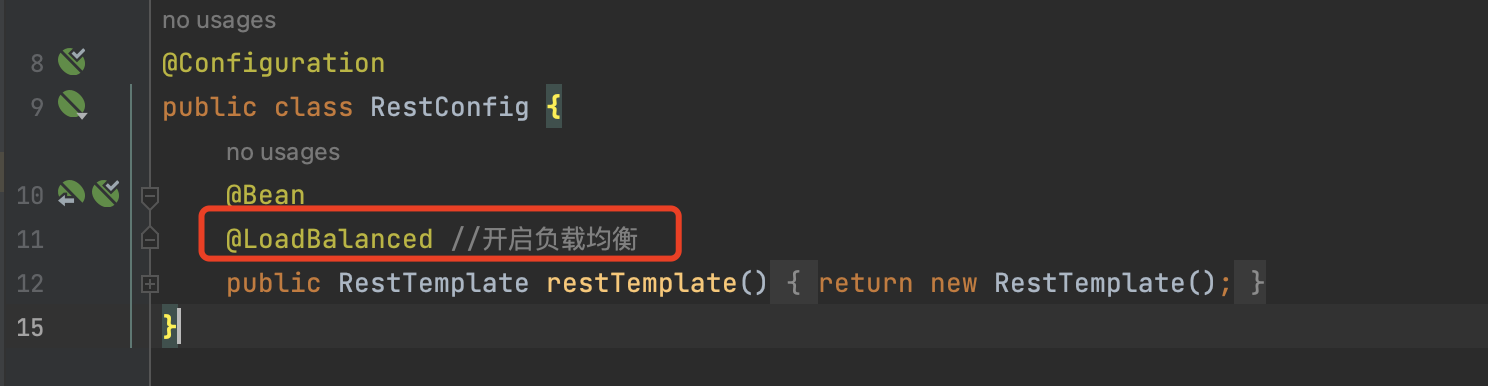
2.4 配置RestTemplate负载均衡
我们在user 用户模块上,创建RestTemplate配置文件 并添加 添加@LoadBalanced注解,让RestTemplate支持 负载均衡
1
2
3
4
5
6
7
8
9
10
11
12
13
14
15
| package com.javaxing.springbootnacos.config;
import org.springframework.cloud.client.loadbalancer.LoadBalanced;
import org.springframework.context.annotation.Bean;
import org.springframework.context.annotation.Configuration;
import org.springframework.web.client.RestTemplate;
@Configuration
public class RestConfig {
@Bean
@LoadBalanced
public RestTemplate restTemplate() {
return new RestTemplate();
}
}
|
2.5 发起请求测试
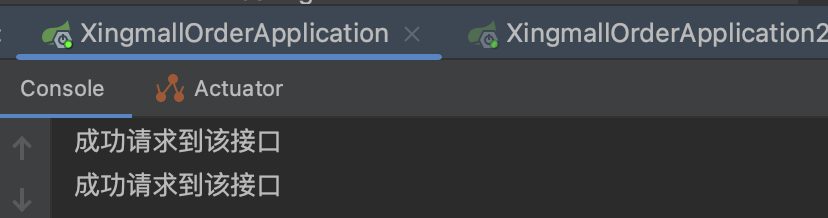
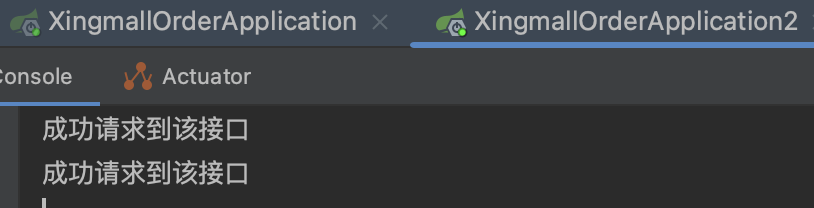
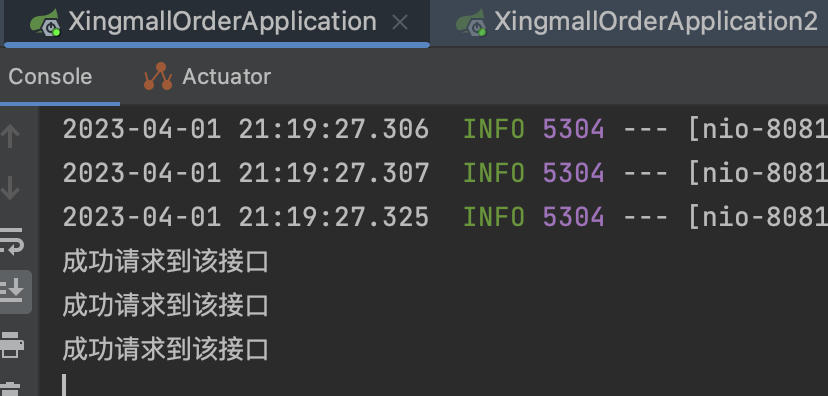
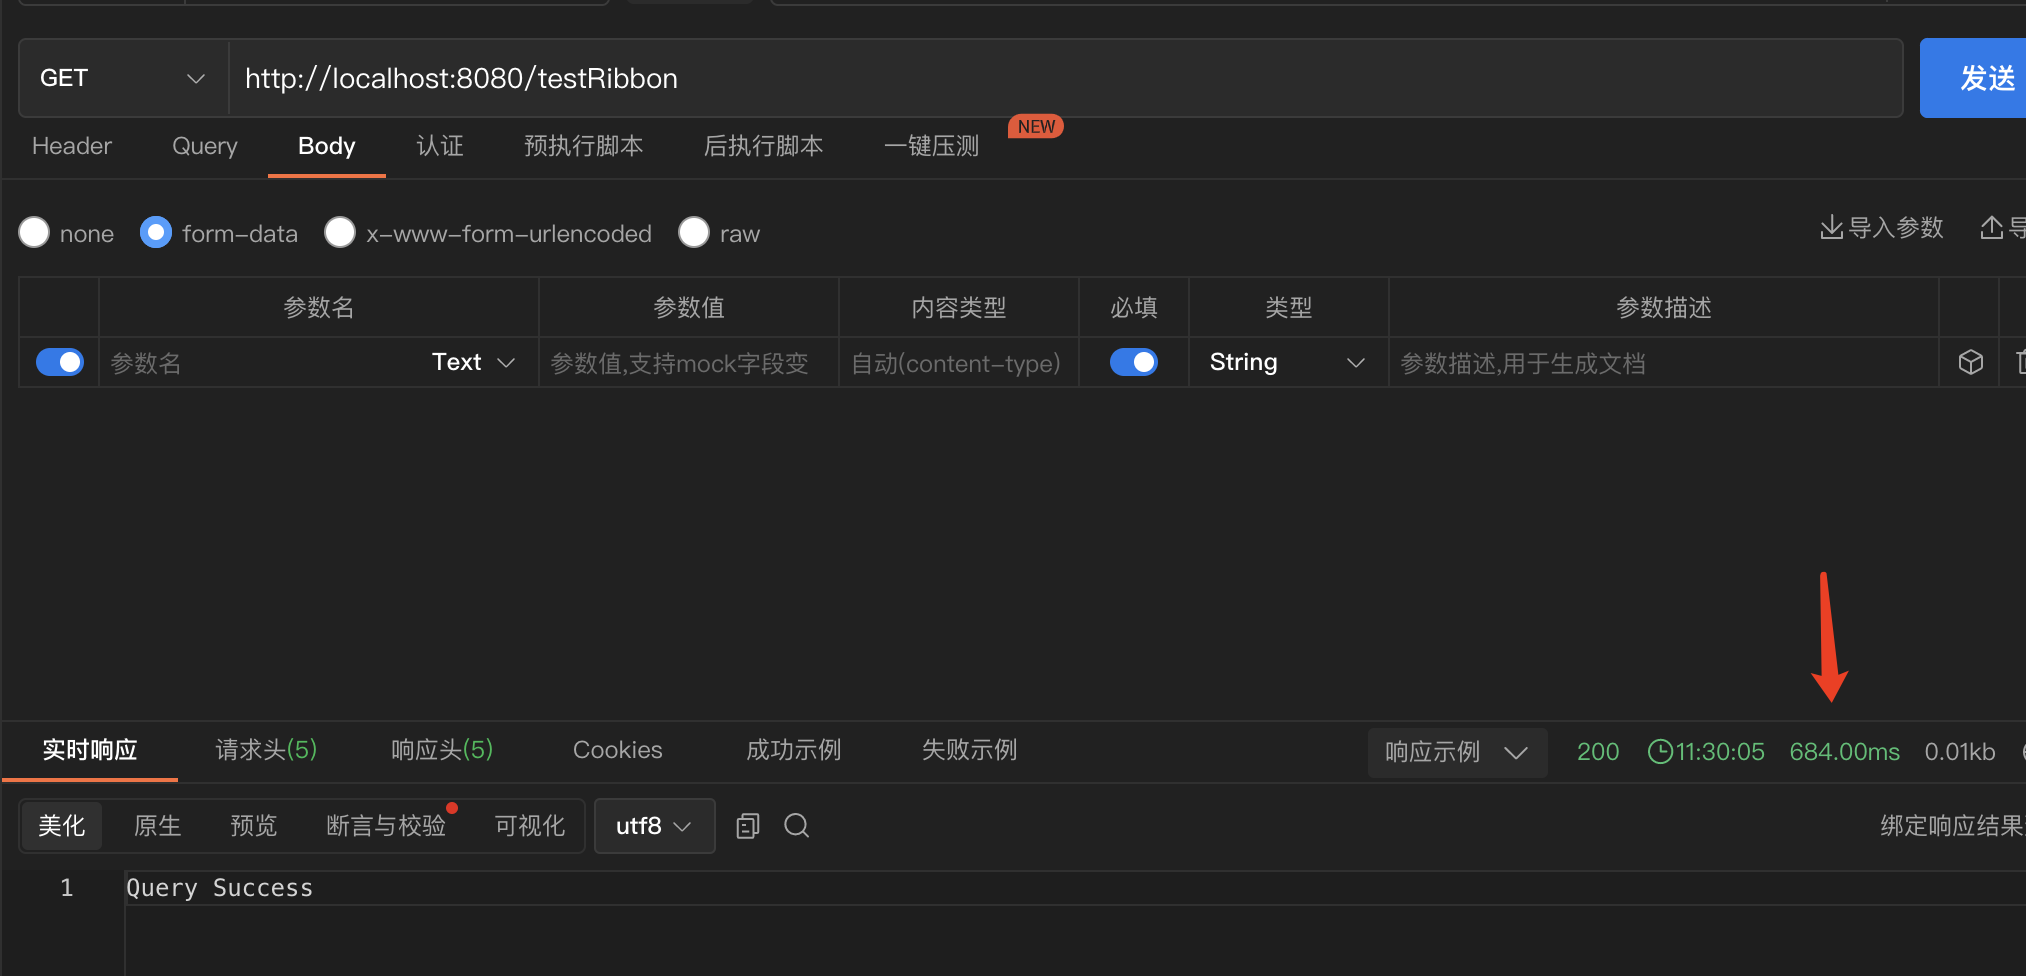
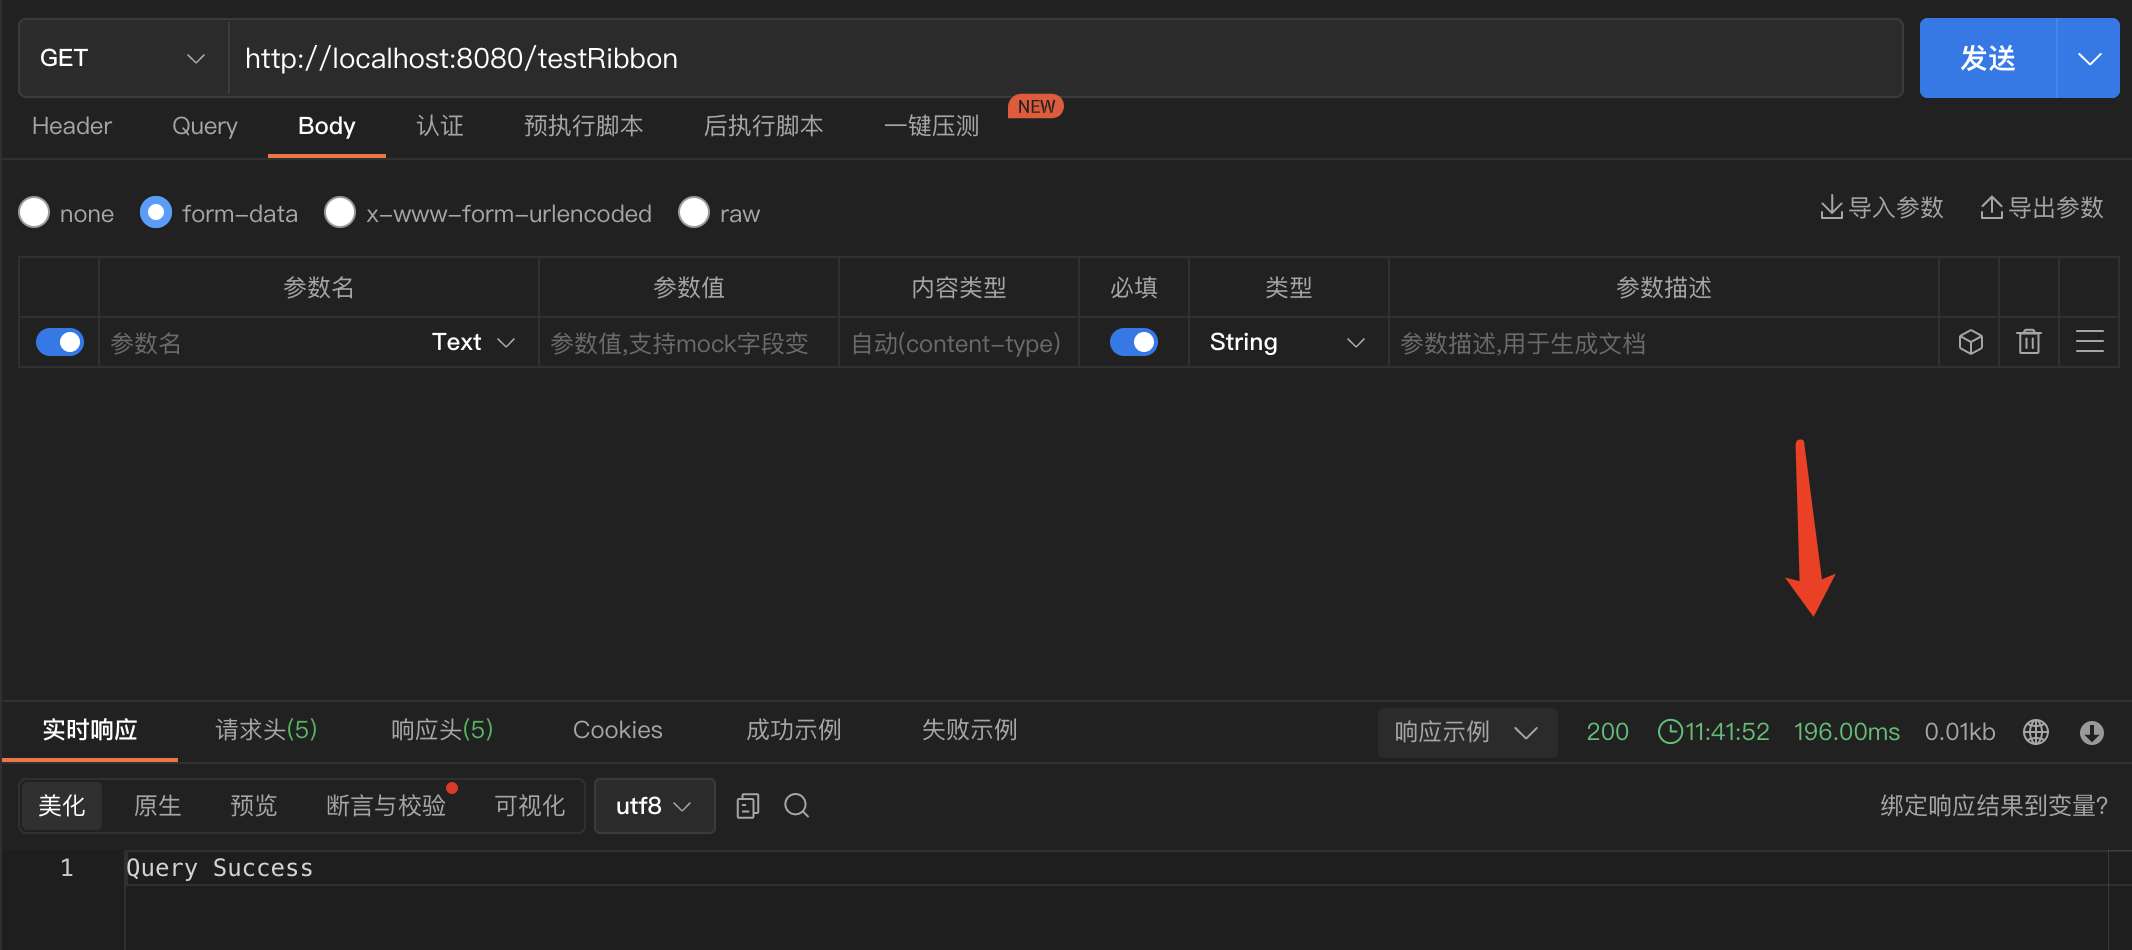
我们访问4次user模块的接口:http://localhost:8080/testRibbon ,他会通过restTemplate去访问order模块接口。

服务端的日志显示,4次请求都平均分散到了order服务器上。
3)Ribbon @LoadBalanced原理
参考源码: LoadBalancerAutoConfiguration。
@LoadBalanced使用了@Qualifier,spring中@Qualifier用于筛选限定注入Bean。@LoadBalanced利用@Qualifier作为restTemplates注入的筛选条件,筛选出具有负载均衡标识的RestTemplate。
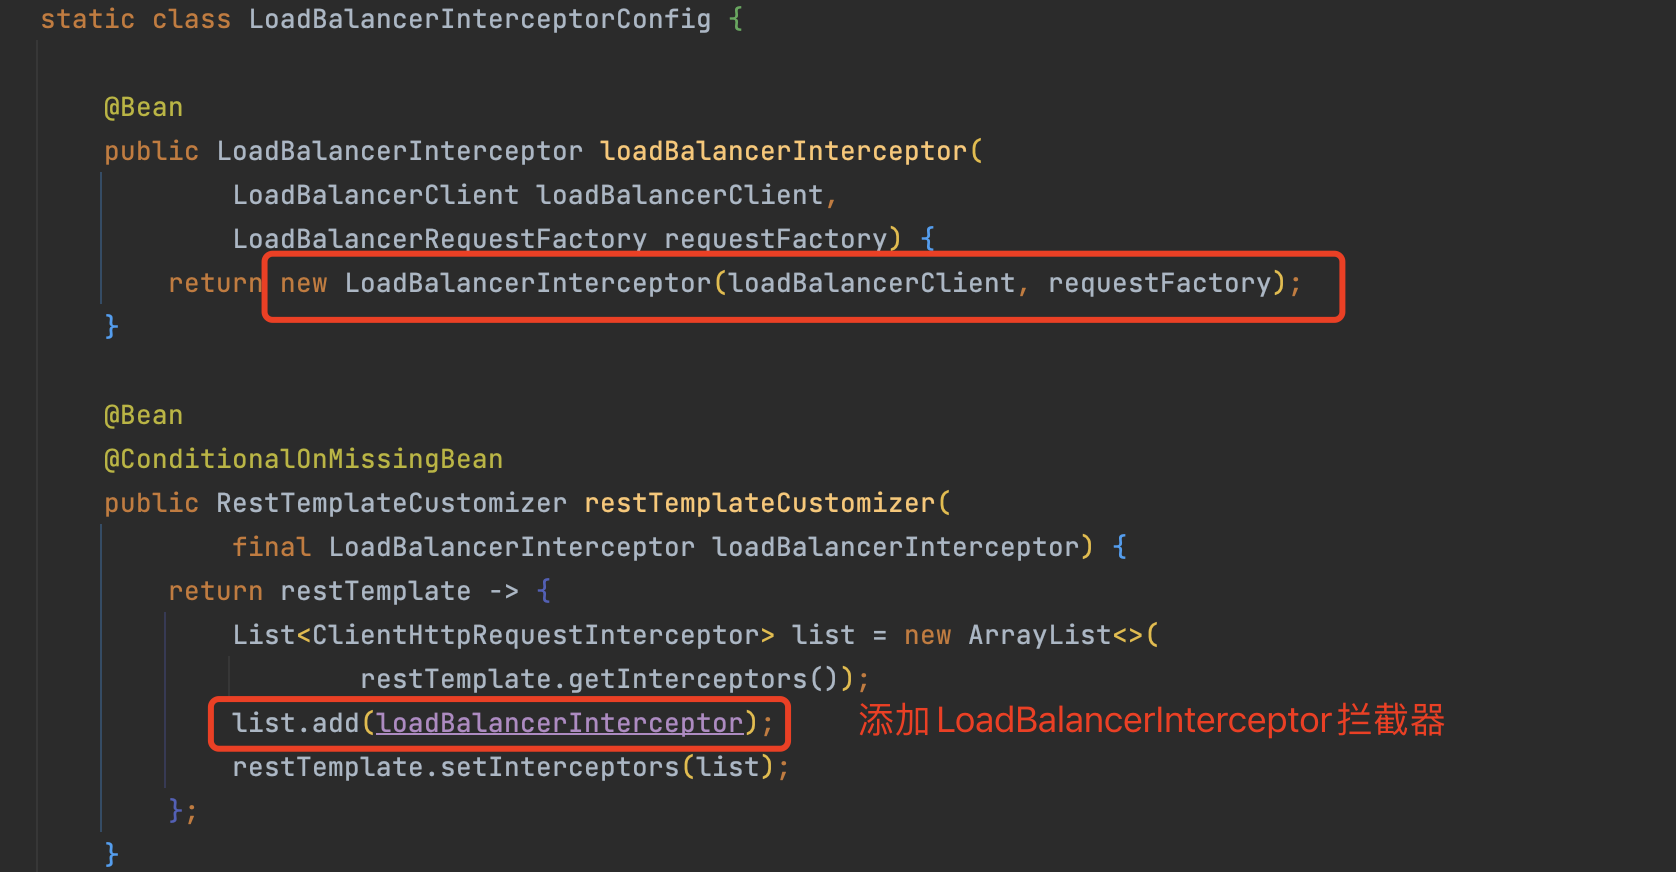
被@LoadBalanced注解的restTemplate会被拦截,添加LoadBalancerInterceptor拦截器。
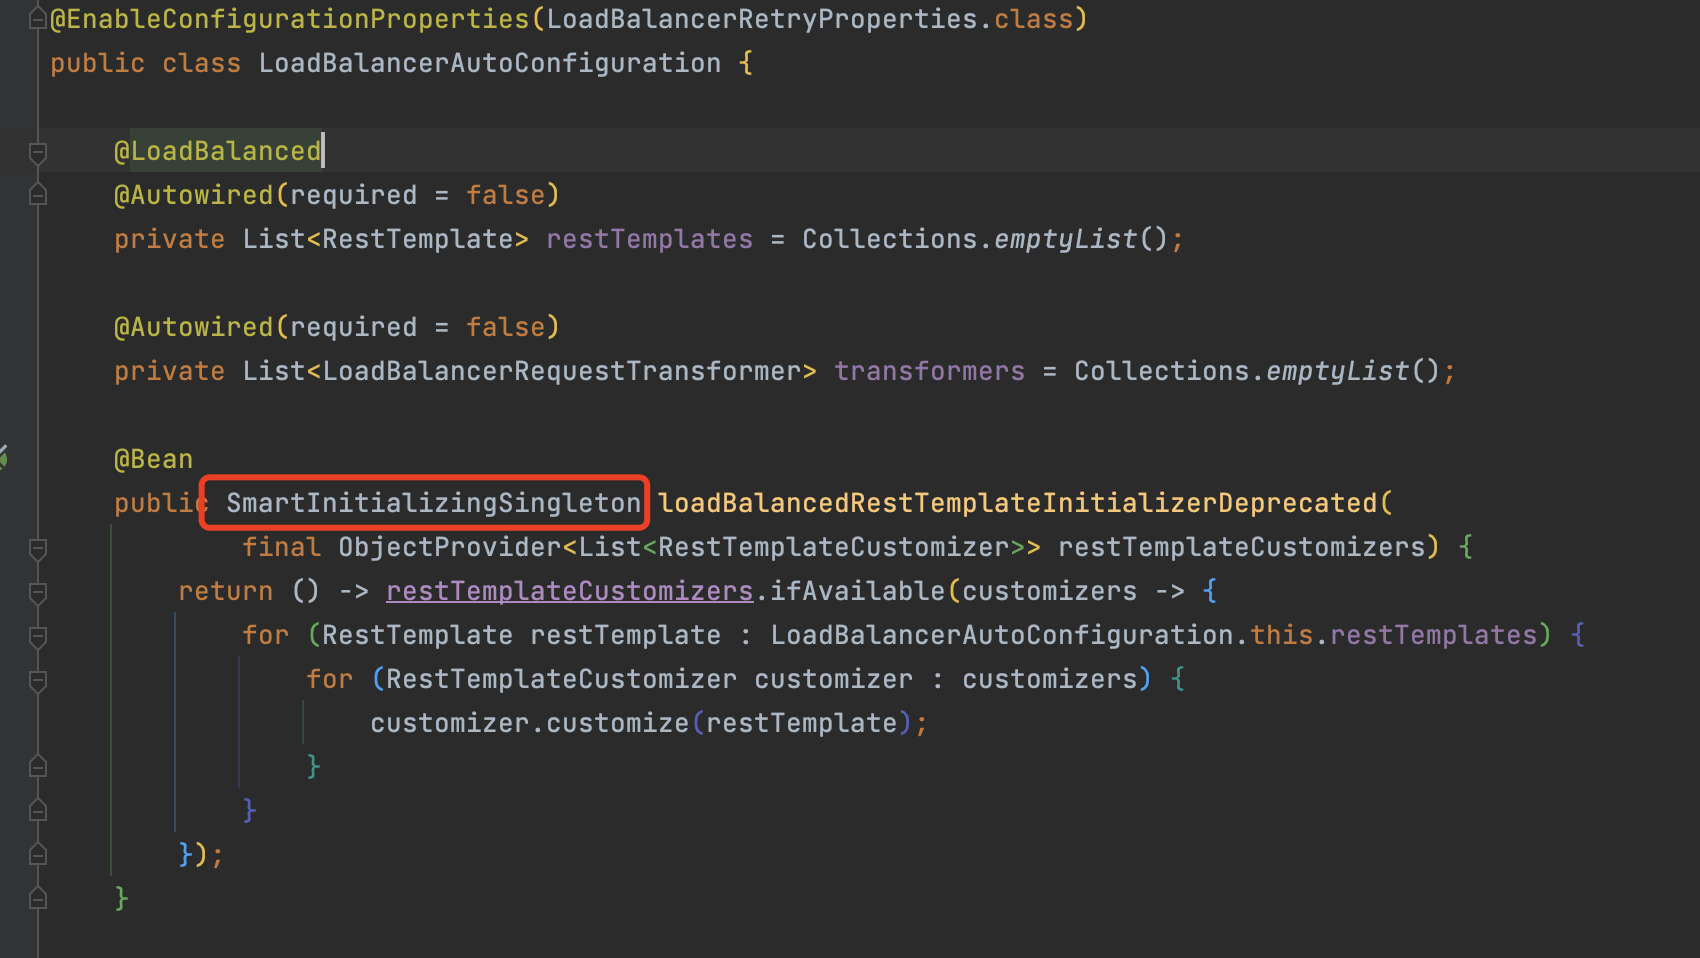
注意:SmartInitializingSingleton所有的bean都实例化完成之后才会调用的,所以在bean的实例化期间使用@LoadBalanced修饰的restTemplate是不具备负载均衡作用的,一定要等bean都实例化完成后再来调用。
如果不使用@LoadBalanced注解,也可以通过添加LoadBalancerInterceptor拦截器让restTemplate起到负载均衡器的作用。
1
2
3
4
5
6
7
| @Bean
public RestTemplate restTemplate(LoadBalancerInterceptor loadBalancerInterceptor) {
RestTemplate restTemplate = new RestTemplate();
restTemplate.setInterceptors(Arrays.asList(loadBalancerInterceptor));
return restTemplate;
}
|
Ribbon扩展功能
1)Ribbon相关接口
参考: org.springframework.cloud.netflix.ribbon.RibbonClientConfiguration
IClientConfig:Ribbon的客户端配置,默认采用DefaultClientConfigImpl实现。
IRule:Ribbon的负载均衡策略,默认采用ZoneAvoidanceRule实现,该策略能够在多区域环境下选出最佳区域的实例进行访问。
IPing:Ribbon的实例检查策略,默认采用DummyPing实现,该检查策略是一个特殊的实现,实际上它并不会检查实例是否可用,而是始终返回true,默认认为所有服务实例都是可用的。
ServerList:服务实例清单的维护机制,默认采用ConfigurationBasedServerList实现。
ServerListFilter:服务实例清单过滤机制,默认采ZonePreferenceServerListFilter,该策略能够优先过滤出与请求方处于同区域的服务实例。
ILoadBalancer:负载均衡器,默认采用ZoneAwareLoadBalancer实现,它具备了区域感知的能力。
2)Ribbon 负载均衡策略

- RandomRule: 随机选择一个Server。
- RetryRule: 对选定的负载均衡策略机上重试机制,在一个配置时间段内当选择Server不成功,则一直尝试使用subRule的方式选择一个可用的server。
- RoundRobinRule: 轮询选择, 轮询index,选择index对应位置的Server。
- AvailabilityFilteringRule: 过滤掉一直连接失败的被标记为circuit tripped的后端Server,并过滤掉那些高并发的后端Server或者使用一个AvailabilityPredicate来包含过滤server的逻辑,其实就是检查status里记录的各个Server的运行状态。
- BestAvailableRule: 选择一个最小的并发请求的Server,逐个考察Server,如果Server被tripped了,则跳过。
- WeightedResponseTimeRule: 根据响应时间加权,响应时间越长,权重越小,被选中的可能性越低。
- ZoneAvoidanceRule:默认的负载均衡策略,即复合判断Server所在区域的性能和Server的可用性选择Server,在没有区域的环境下,类似于轮询
- NacosRule: 优先调用同一集群的实例,基于随机权重
3)修改默认负载均衡策略
修改负载均衡策略的话,有两种方式,一种是直接全局配置,一种是局部配置。
1.全局配置
该服务下所有的请求都会根据这个策略进行负载均衡。
1
2
3
4
5
6
7
8
9
10
11
12
13
14
15
16
17
18
19
20
21
| package com.javaxing.springbootnacos.config;
import com.alibaba.cloud.nacos.ribbon.NacosRule;
import com.netflix.loadbalancer.IRule;
import org.springframework.context.annotation.Bean;
import org.springframework.context.annotation.Configuration;
@Configuration
public class RibbonConfig {
@Bean
public IRule ribbonRule() {
return new NacosRule();
}
}
|
我们这里使用Nacos提供的负载均衡策略,优先调用同一集群的实例,基于随机权重。
2.局部配置
该服务下的指定微服务模块才会根据该策略进行负载均衡,其他模块均以默认的策略进行负载均衡。
1
2
3
4
5
6
7
8
9
10
11
12
13
14
15
16
| server:
port: 8080
spring:
application:
name: xingmall-user
cloud:
nacos:
discovery:
server-addr: 10.211.55.12:8848
namespace: 37731914-6c28-4265-a090-7a9391ed843d
cluster-name: shanghai
xingmall-order:
ribbon:
NFLoadBalancerRuleClassName: com.alibaba.cloud.nacos.ribbon.NacosRule
|
3.验证Nacos负载均衡策略
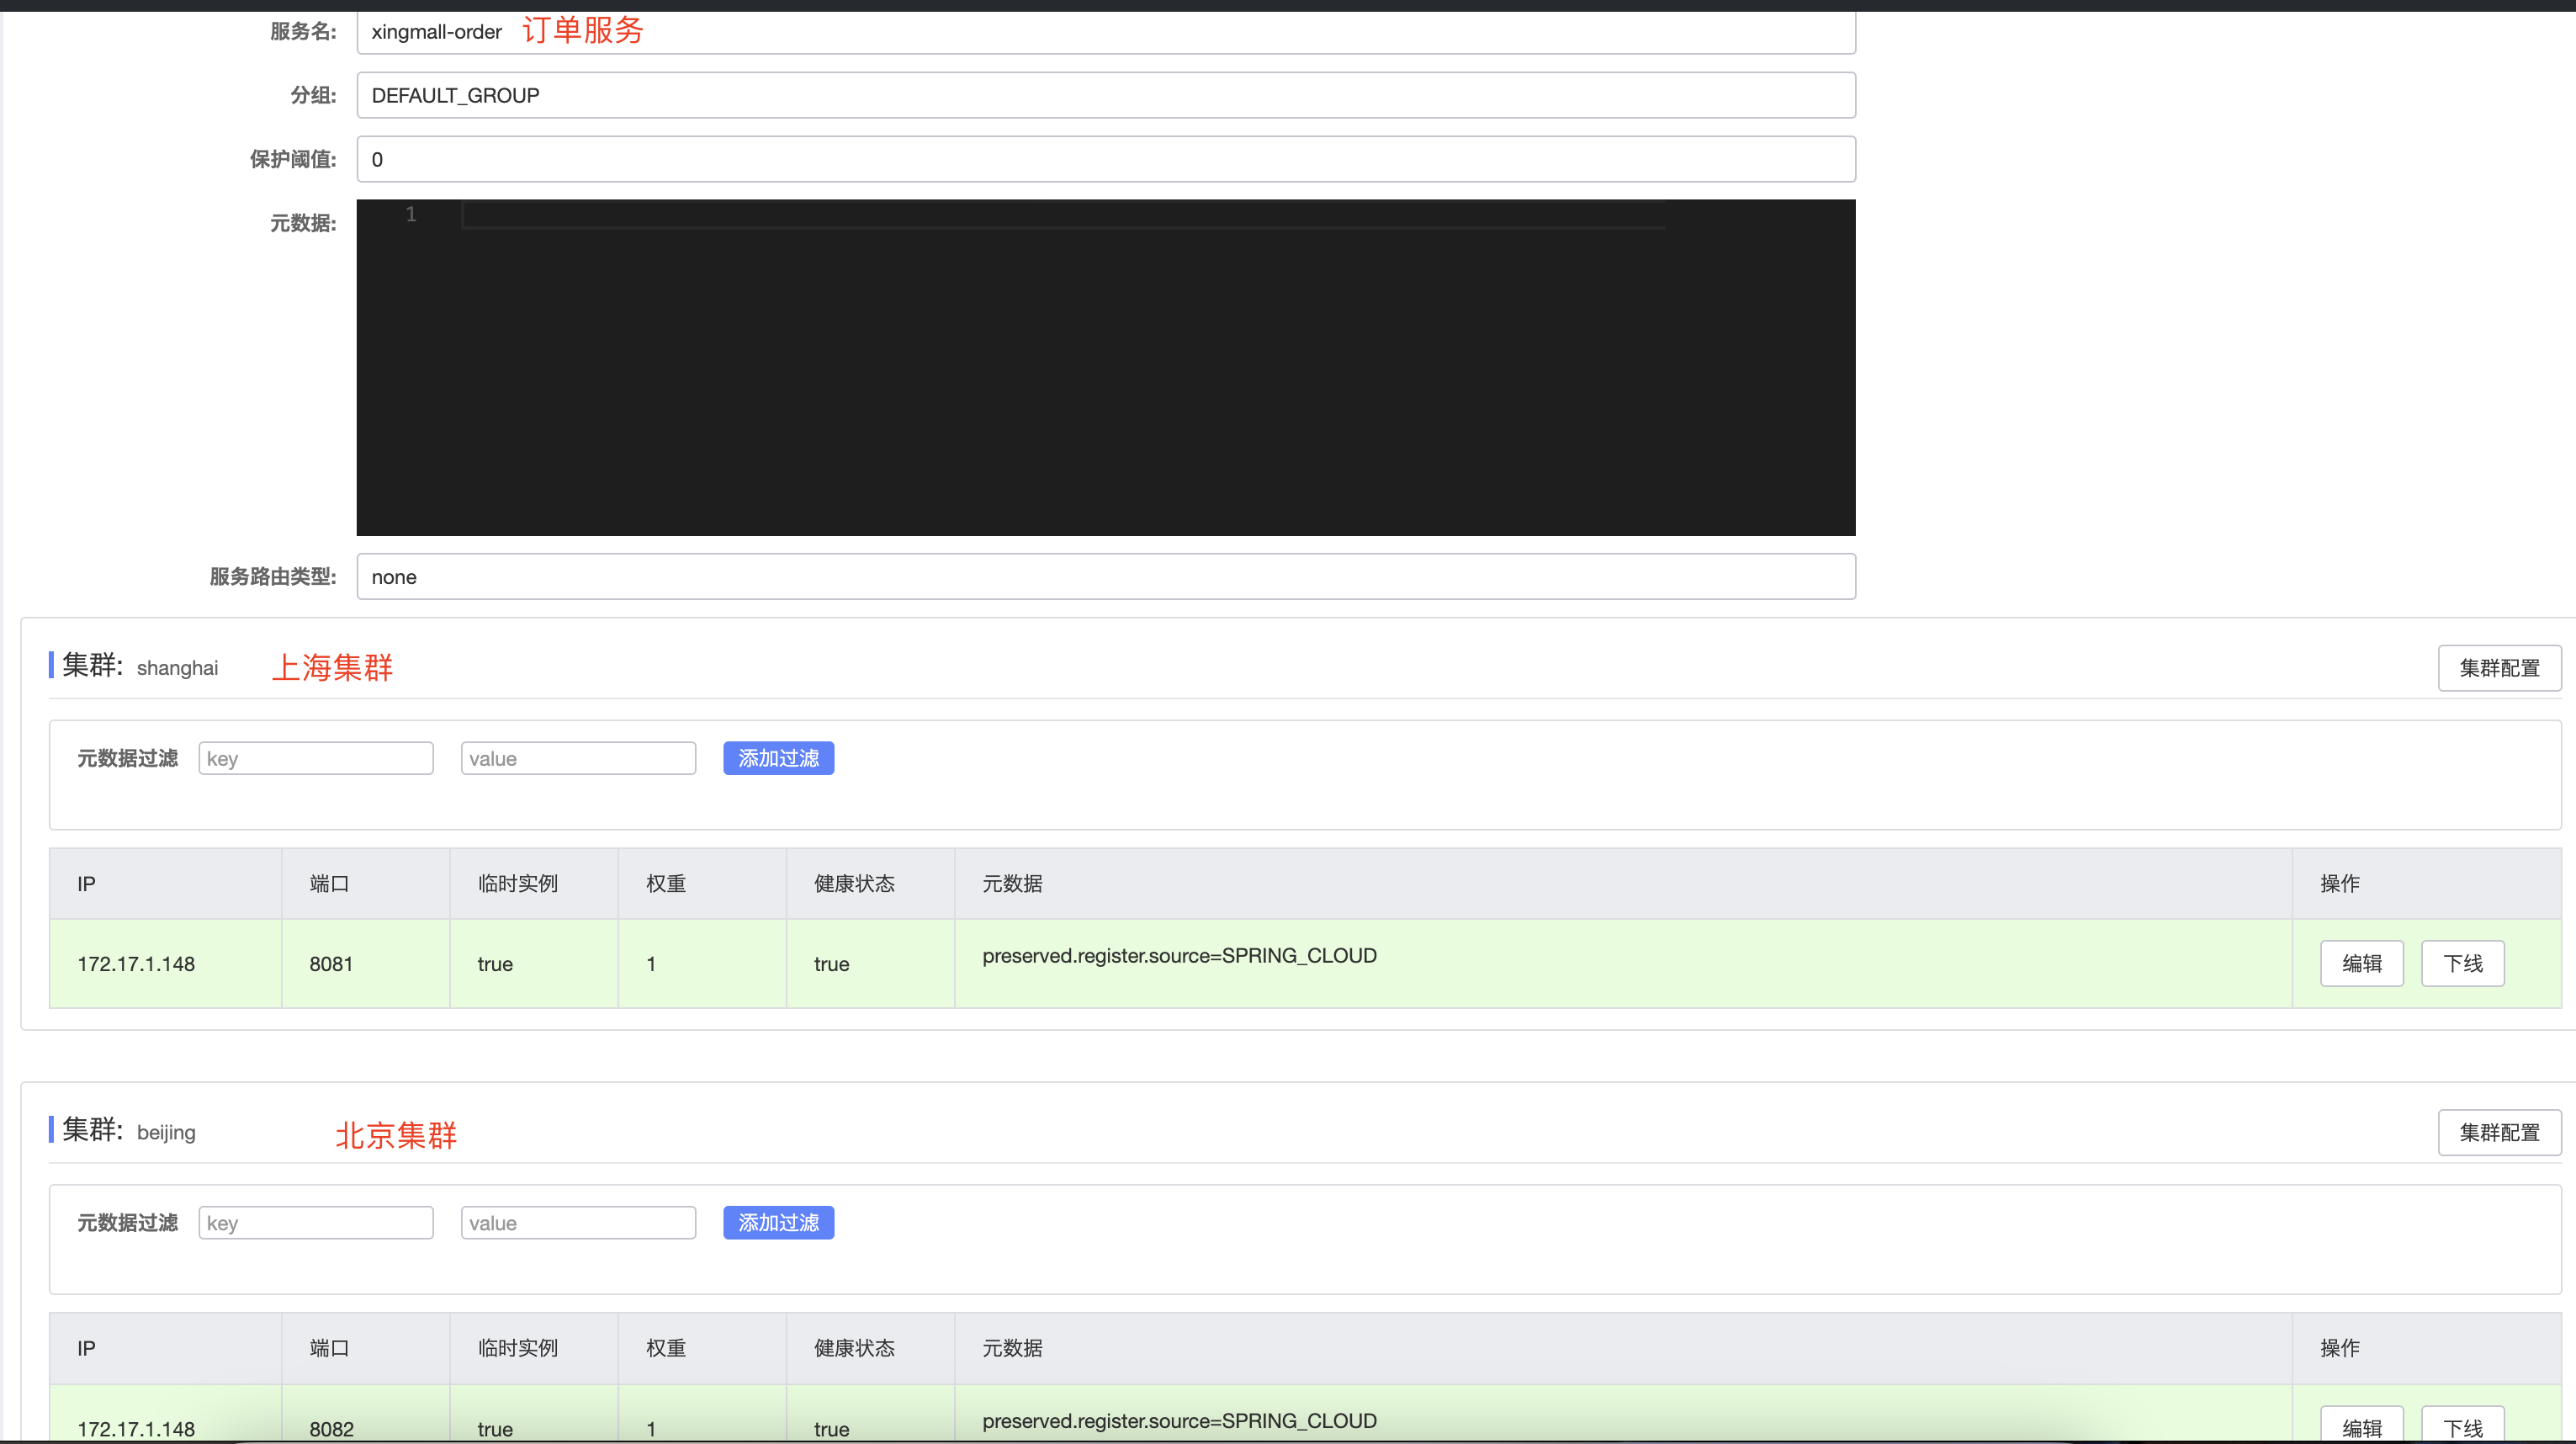
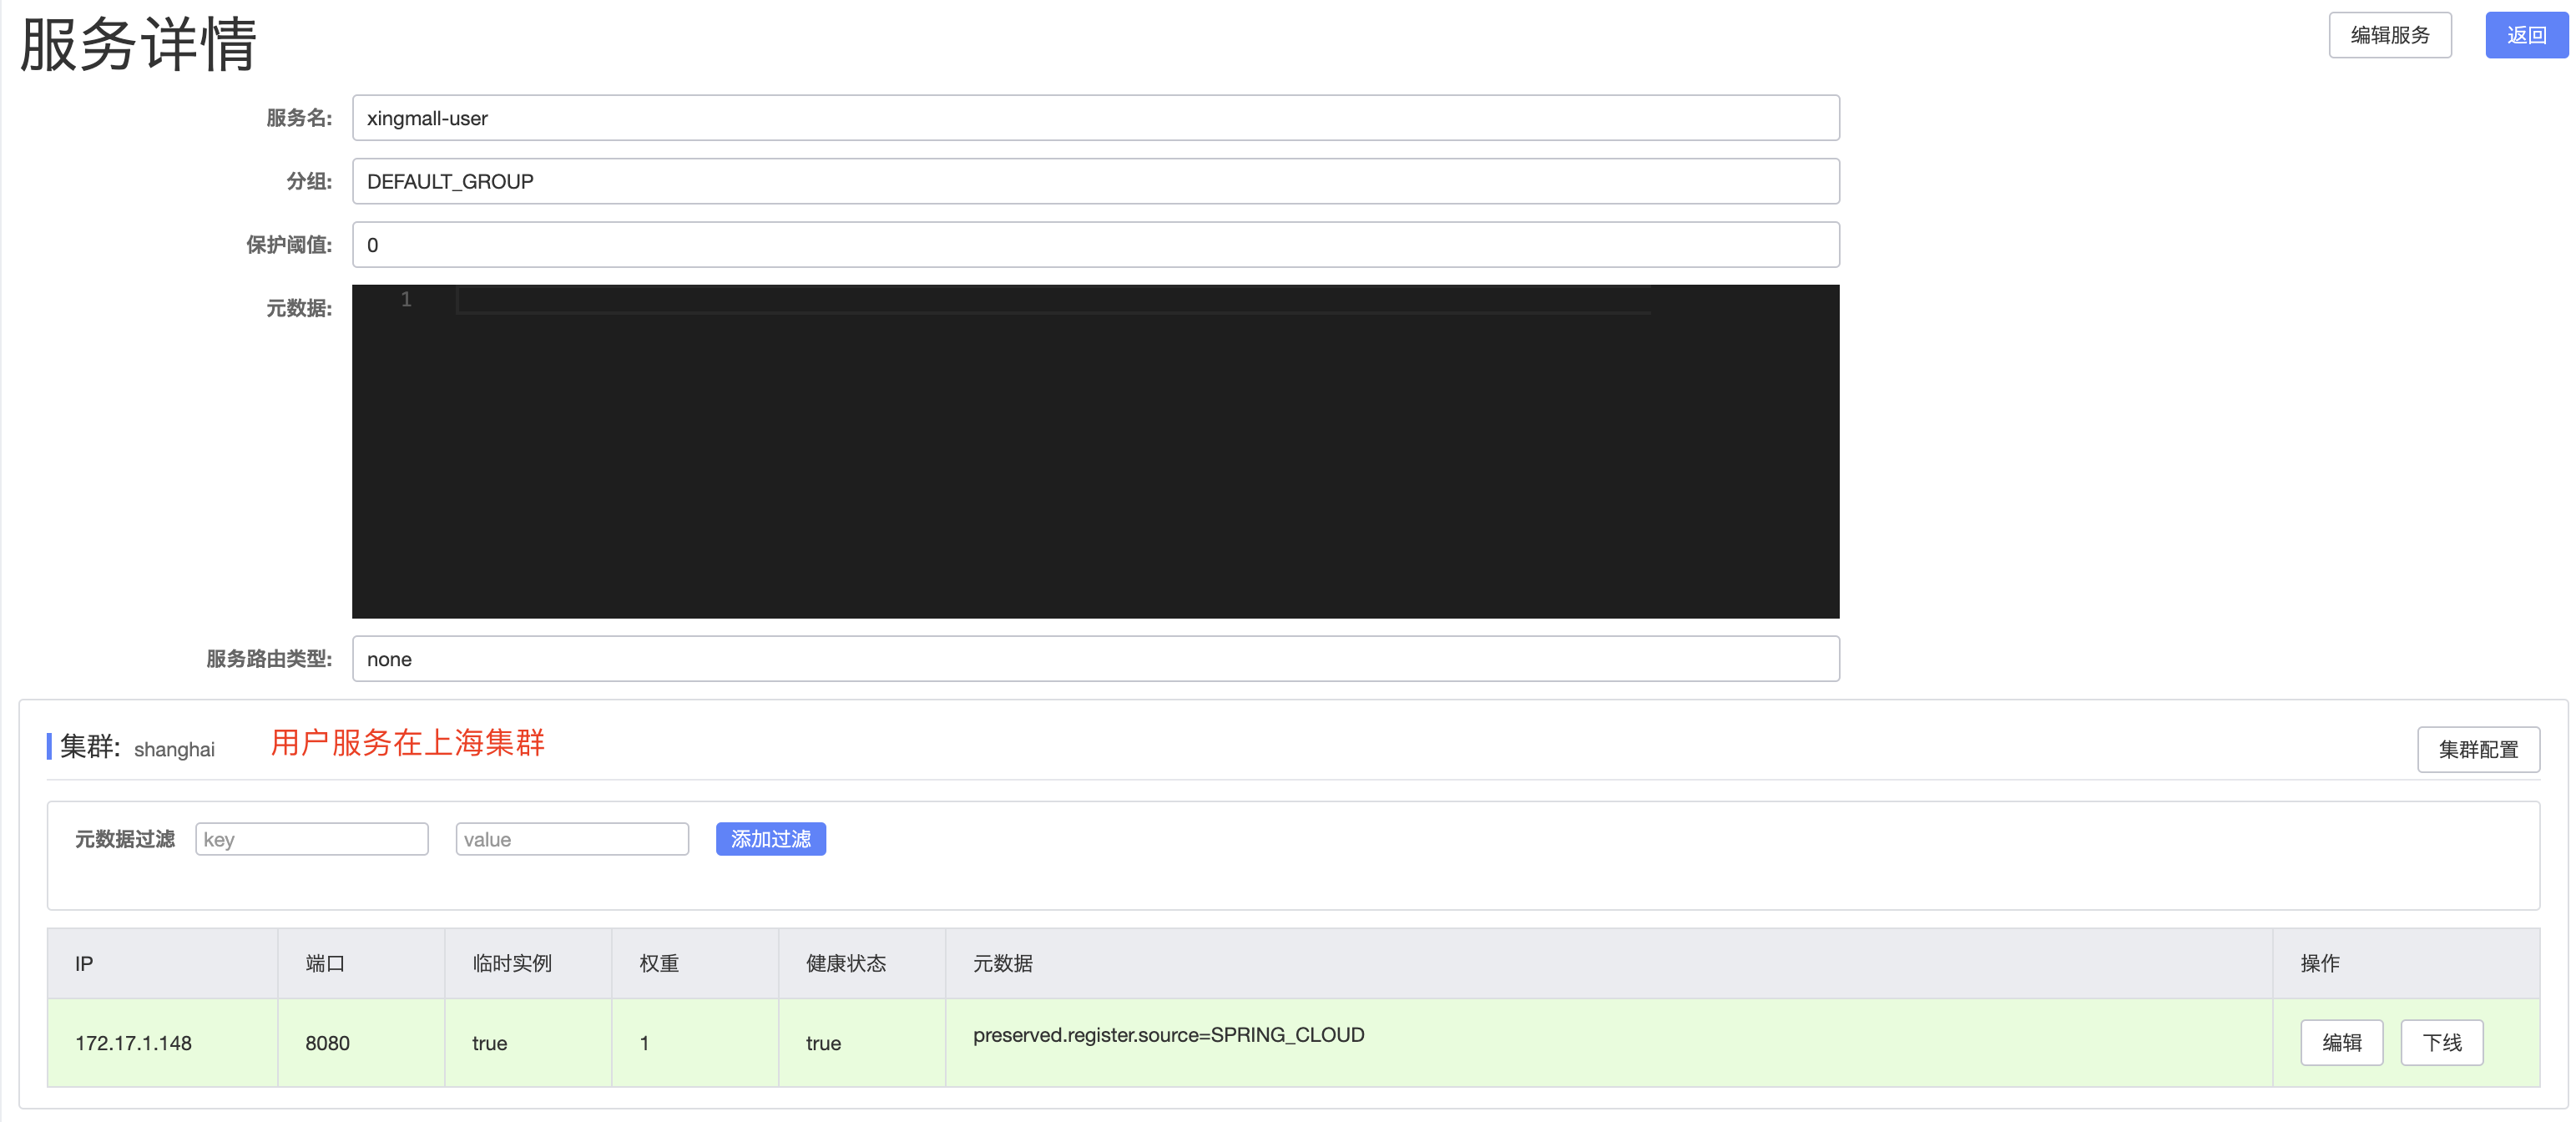
我们把xingmall-order2个服务进行区域划分,一个服务划分到北京,一个服务划分到上海,而xingmall-user划分到上海,那么如果我们请求user的接口时,user会去访问order服务,他会优先访问 同一个集群(区域)的服务,如果访问不到才会去访问其他集群的服务。
xingmall-order服务
xingmall-user
访问user接口测试
接口:http://localhost:8080/testRibbon
我们请求了9次,有6次落到了上海集服务器上,有3次落到了北京集群服务器上。
由此可以看出,现在已经并非是默认的负载均衡策略了,而是优先调用同一集群的实例。
注意:在实际测试过程中,发现一旦实现全局配置后,Nacos的代码会报错,因为缺少一个StringUtils依赖,所以我们要在user项目中引入该依赖。
1
2
3
4
5
6
7
| <dependencies>
<dependency>
<groupId>org.apache.commons</groupId>
<artifactId>commons-lang3</artifactId>
<version>3.0</version>
</dependency>
</dependencies>
|

4.Nacos负载均衡策略源码分析
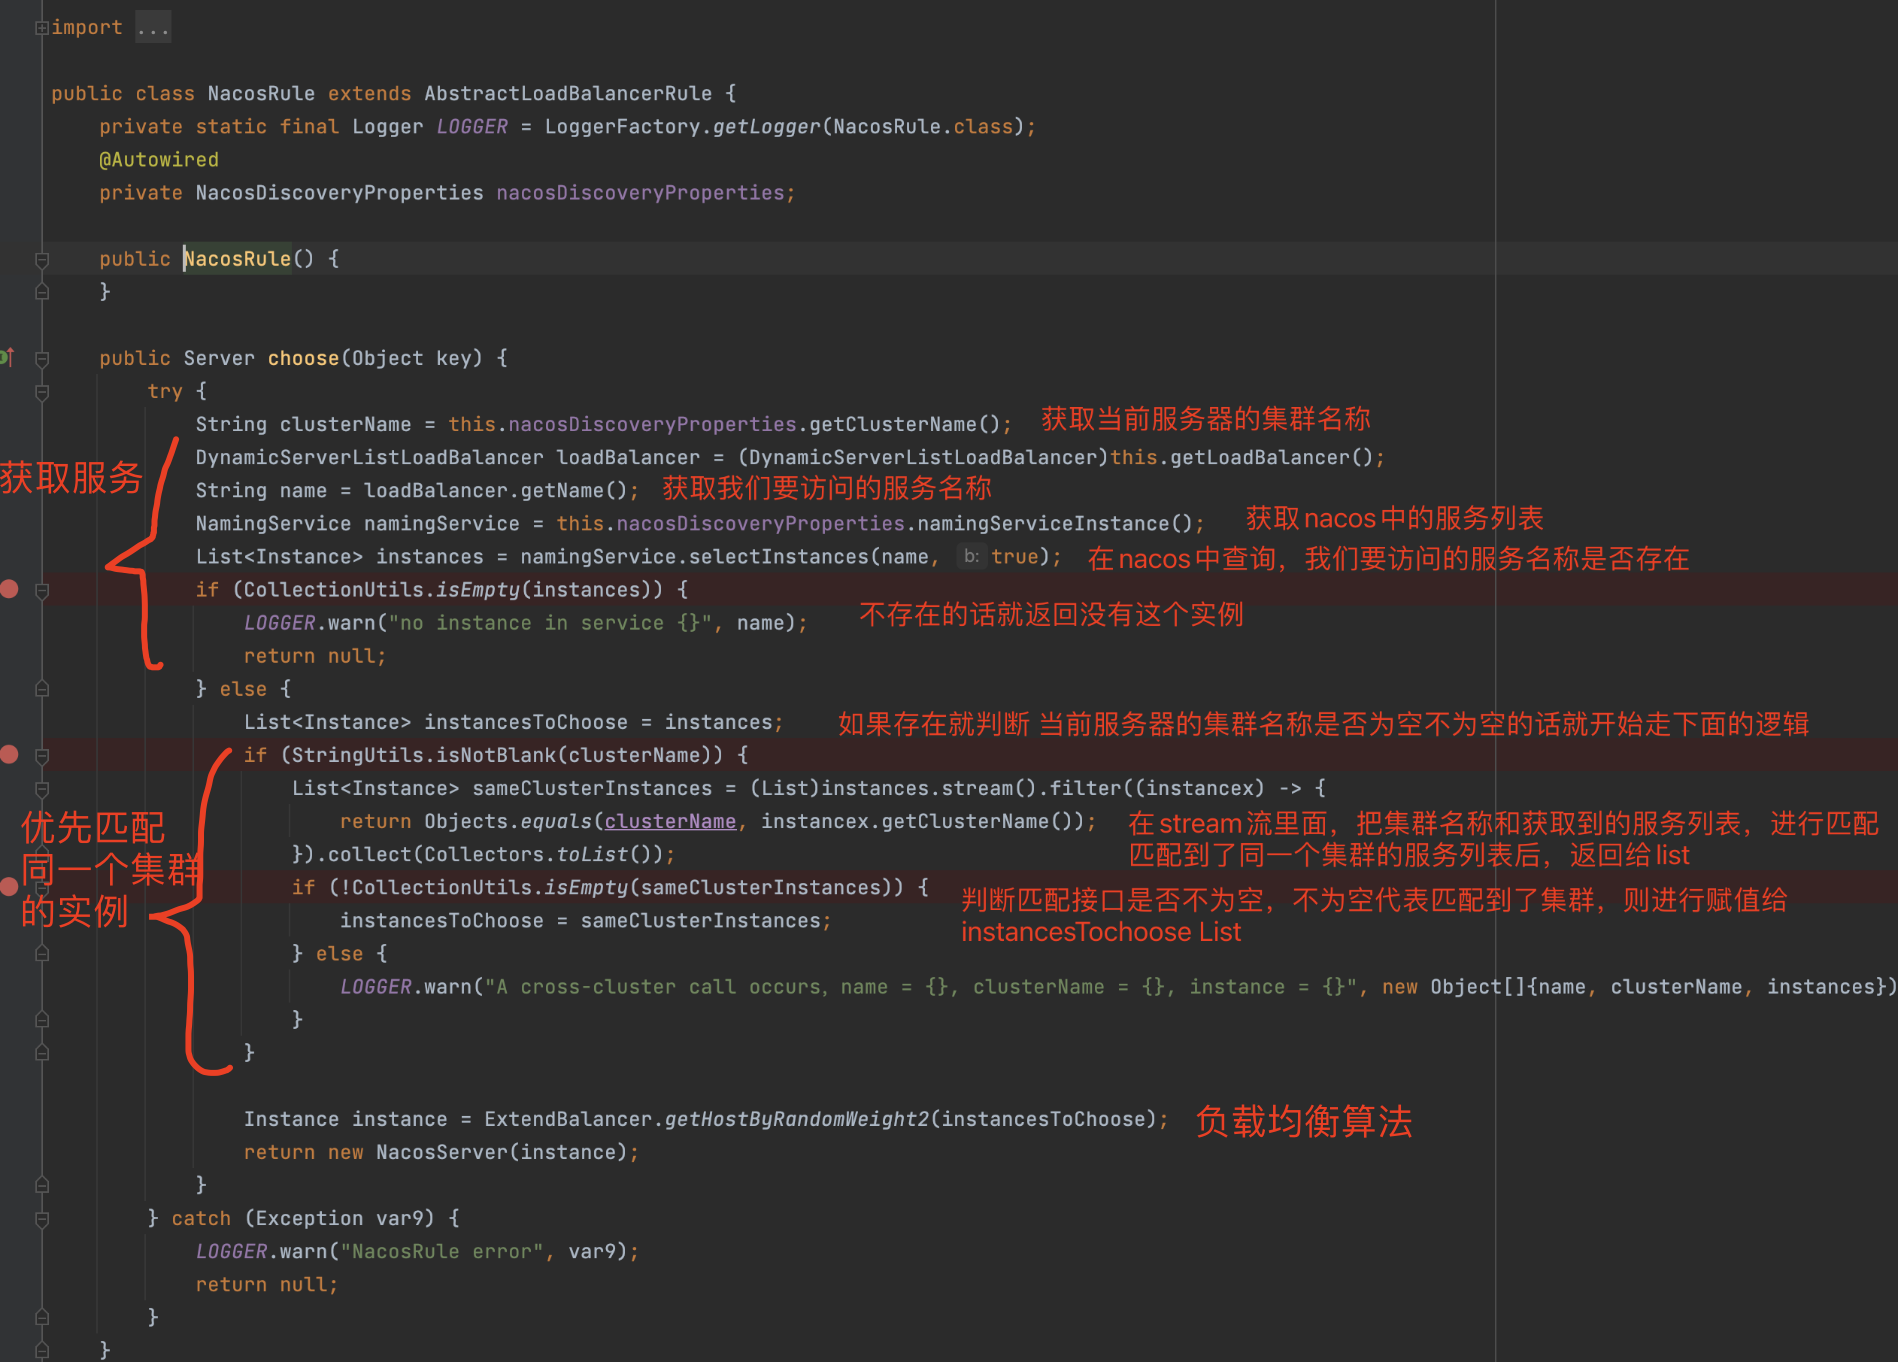
负载均衡策略入口:NacosRule ->choose
4)自定义负载均衡策略
我们可以通过IRule接口可以自定义负载均衡策略:
1
2
3
4
5
6
7
8
9
10
11
12
13
14
15
16
17
18
19
20
21
22
23
24
25
26
27
28
29
30
31
32
33
34
35
36
37
38
39
40
41
| package com.javaxing.springbootnacos.rule;
import com.alibaba.cloud.nacos.NacosDiscoveryProperties;
import com.alibaba.cloud.nacos.ribbon.NacosServer;
import com.alibaba.nacos.api.exception.NacosException;
import com.alibaba.nacos.api.naming.NamingService;
import com.alibaba.nacos.api.naming.pojo.Instance;
import com.netflix.client.config.IClientConfig;
import com.netflix.loadbalancer.AbstractLoadBalancerRule;
import com.netflix.loadbalancer.DynamicServerListLoadBalancer;
import com.netflix.loadbalancer.Server;
import org.springframework.beans.factory.annotation.Autowired;
public class NacosRandomWithWeightRule extends AbstractLoadBalancerRule {
@Autowired
private NacosDiscoveryProperties nacosDiscoveryProperties;
@Override
public Server choose(Object key) {
DynamicServerListLoadBalancer loadBalancer = (DynamicServerListLoadBalancer) getLoadBalancer();
String serviceName = loadBalancer.getName();
NamingService namingService = nacosDiscoveryProperties.namingServiceInstance();
try {
Instance instance = namingService.selectOneHealthyInstance(serviceName);
return new NacosServer(instance);
} catch (NacosException e) {
e.printStackTrace();
}
return null;
}
@Override
public void initWithNiwsConfig(IClientConfig clientConfig) {
}
}
|
1.全局配置
1
2
3
4
5
6
7
8
9
10
11
12
13
14
15
16
17
18
19
20
21
| package com.javaxing.springbootnacos.config;
import com.alibaba.cloud.nacos.ribbon.NacosRule;
import com.javaxing.springbootnacos.rule.NacosRandomWithWeightRule;
import com.netflix.loadbalancer.IRule;
import org.springframework.context.annotation.Bean;
import org.springframework.context.annotation.Configuration;
@Configuration
public class RibbonConfig {
@Bean
public IRule ribbonRule() {
return new NacosRandomWithWeightRule();
}
}
|
2.局部配置
1
2
3
4
5
|
xingmall-order:
ribbon:
NFLoadBalancerRuleClassName: com.javaxing.springbootnacos.rule.NacosRandomWithWeightRule
|
3.验证自定义负载均衡策略
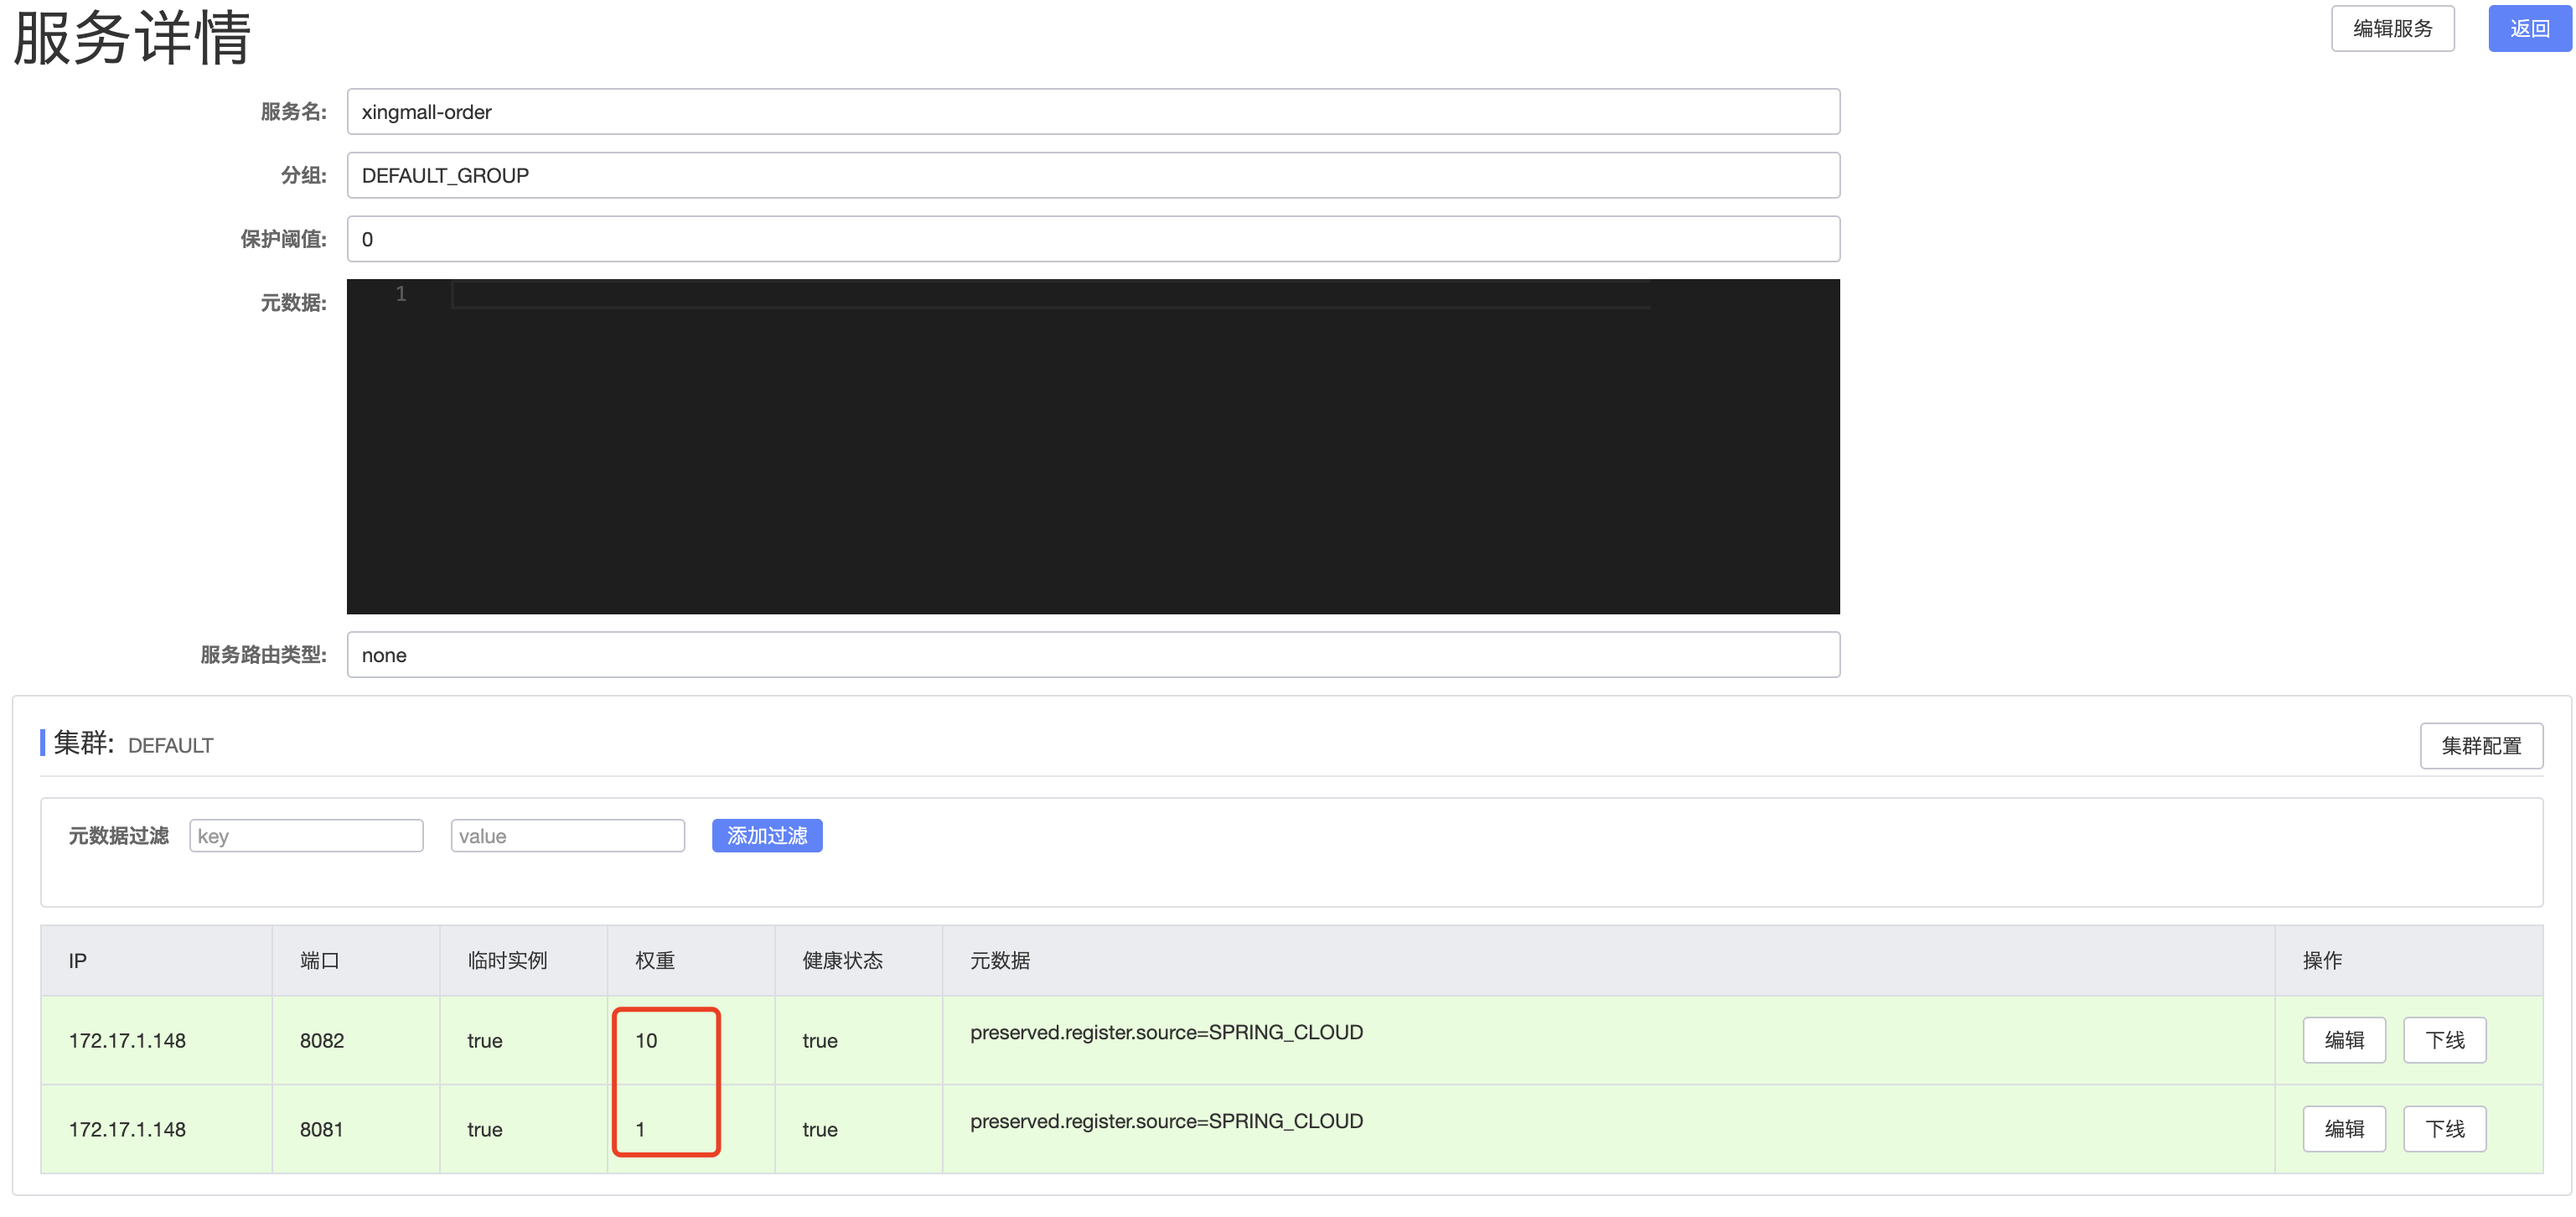
订单服务有2个服务端,其中8082端口的服务权重=10,8081权重=1,那么我们进行调用的时候,请求应该更多的落在了8082服务端。
请求访问
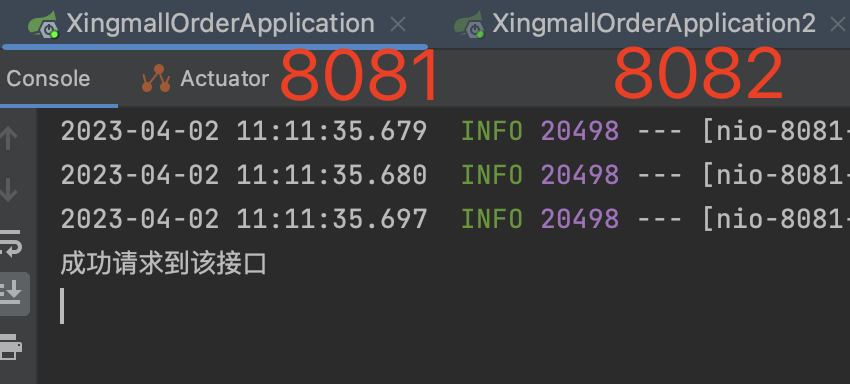
如图所示,8082 因为权重高,所以10个请求有9个落到了8082,1个落到了8081 。
5)饥饿加载
如果服务器是刚启动的话,第一次调用会比较慢,因为需要加载很多组件,需要去获取实例列表,并根据负载均衡策略进行请求。

1.优化方法
我们可以使用饥饿加载,顾名思义,就是让SpringBoot在启动时,他会自动加载LoadBalancer并去拉去Nacos中的可用服务实例。
1
2
3
4
5
6
7
8
9
10
11
12
13
14
15
16
17
18
19
20
21
22
23
24
| server:
port: 8080
spring:
application:
name: xingmall-user
cloud:
nacos:
discovery:
server-addr: 10.211.55.12:8848
namespace: 37731914-6c28-4265-a090-7a9391ed843d
cluster-name: shanghai
xingmall-order:
ribbon:
NFLoadBalancerRuleClassName: com.javaxing.springbootnacos.rule.NacosRandomWithWeightRule
ribbon:
eager-load:
enabled: true
clients: xingmall-order
|
开启饥饿加载后,当我们启动微服务时候,他会自动加载LoadBalancer并去拉去Nacos中的可用服务实例。
当我们再次去调用时,明显看到延迟响应降低了很多,但是因为 第一次进行远程调用涉及到一些组件,所以还是会有所损耗,但是比刚才好多了,第二次在调用的时候,不需要再次加载组件,延迟可以降低到30ms。

LoadBalancer 负载均衡器
Spring Cloud LoadBalancer是Spring Cloud官方自己提供的客户端负载均衡器, 用来替代Ribbon。
但是实际上截止到2023年,生产环境中大部分用的还是Ribbon,而并非LoadBalancer,但是Ribbon已经在2019年停止维护了,只能说LoadBalancer未来可期,但不适合现在。
1)RestTemplate整合LoadBalancer
在RestTemplate使用LoadBalancer的话,需要引入依赖,然后使用@LoadBalanced注解修饰RestTemplate,其他的和Ribbon没有区别。
1.1 引入依赖
1
2
3
4
5
6
7
8
9
10
11
12
13
14
15
16
17
18
19
20
21
22
23
|
<dependency>
<groupId>org.springframework.cloud</groupId>
<artifactId>spring-cloud-starter-loadbalancer</artifactId>
</dependency>
<dependency>
<groupId>org.springframework.boot</groupId>
<artifactId>spring-boot-starter-web</artifactId>
</dependency>
<dependency>
<groupId>com.alibaba.cloud</groupId>
<artifactId>spring-cloud-starter-alibaba-nacos-discovery</artifactId>
<exclusions>
<exclusion>
<groupId>org.springframework.cloud</groupId>
<artifactId>spring-cloud-starter-netflix-ribbon</artifactId>
</exclusion>
</exclusions>
</dependency>
|
注意: 由于nacos-discovery中引入了ribbon,**需要移除ribbon的包,如果不移除,也可以在yml中配置不使用ribbon。
1
2
3
4
5
6
7
8
9
10
11
| spring:
application:
name: mall-user-loadbalancer-demo
cloud:
nacos:
discovery:
server-addr: 127.0.0.1:8848
loadbalancer:
ribbon:
enabled: false
|
1.2 使用@LoadBalanced注解
使用@LoadBalanced注解修饰RestTemplate,开启客户端负载均衡功能
1
2
3
4
5
6
7
8
| @Configuration
public class RestConfig {
@Bean
@LoadBalanced
public RestTemplate restTemplate() {
return new RestTemplate();
}
}
|
1.3 使用RestTemplate
1
2
3
4
5
6
7
8
9
10
11
12
13
14
15
16
17
18
19
20
21
| package com.javaxing.springbootnacos.contrller;
import org.springframework.beans.factory.annotation.Autowired;
import org.springframework.web.bind.annotation.RequestMapping;
import org.springframework.web.bind.annotation.RestController;
import org.springframework.web.client.RestTemplate;
@RestController
public class UserContrller {
@Autowired
private RestTemplate restTemplate;
@RequestMapping(value = "/testRibbon")
public String testRibbon() {
String url = "http://xingmall-order/queryOrder";
String result = restTemplate.getForObject(url,String.class);
return result;
}
}
|